Before You Start: Two Decisions to Make
Before clicking anything, settle these two questions:
- Who is this list for? One genre, all your books, or a specific series? Starting focused makes segmentation easier later.
- What will you send? A launch announcement list needs different expectations than a weekly newsletter. Tell readers upfront so they know what they're signing up for.
Neither decision is permanent, but having an answer speeds up every step below.
---
Step 1: Create Your Account
Go to AuthorMailingLists.com and sign up with your author email—ideally the one tied to your author domain (e.g., hello@yourname.com) rather than a personal Gmail. Using a domain email helps deliverability from day one. During onboarding you'll enter your author name and website URL. These pre-populate your sender details and the footer of every email, which is required by CAN-SPAM and GDPR.
---
Step 2: Create Your First List
In the left navigation, click Lists, then New List.
Give your list a clear internal name—something like "Fantasy Readers" or "All Subscribers" rather than "List 1." You'll thank yourself when you have three lists six months from now.
Key settings to configure here:
- Double opt-in: Leave this on. Yes, you'll lose 10–20% of signups who don't confirm, but the subscribers who do confirm are real people who actually want your emails. Deliverability is better, complaint rates are lower.
- Confirmation email subject: Customize this. The default "Please confirm your subscription" is fine, but "One click to get your free chapter" converts better if you're offering a lead magnet.
- From name and reply-to address: Use your author name, not your book title. Readers need to recognize you across series.

---
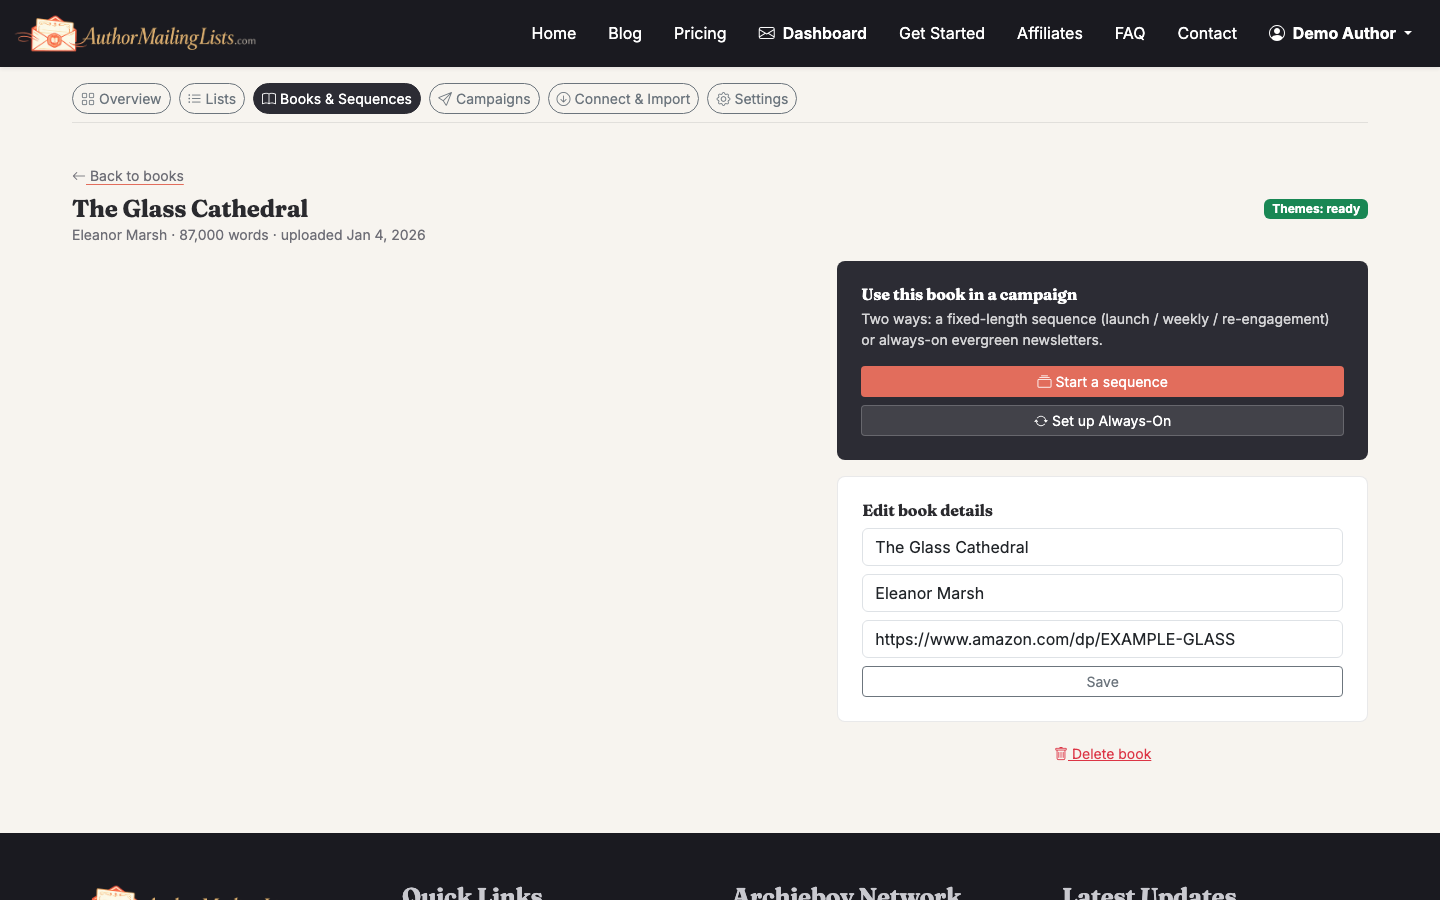
Step 3: Add Your Book Catalog (Optional but Recommended)
AuthorMailingLists.com has a built-in book catalog where you can add titles, characters, themes, and series information. This isn't just metadata—the AI uses it to draft your weekly Always-On newsletters automatically.
Click Catalog in the left nav, then Add Book. Fill in title, genre, series name, a short blurb, and a few character or theme tags.
If you're just starting and have one book, add that one. You can expand later. If you have a backlist, add your top three to five titles now—it gives the AI enough material to rotate content without repeating.
---
Step 4: Set Up Your Signup Widget
This is how readers actually get onto your list. Go to Lists → [Your List] → Signup Widget.
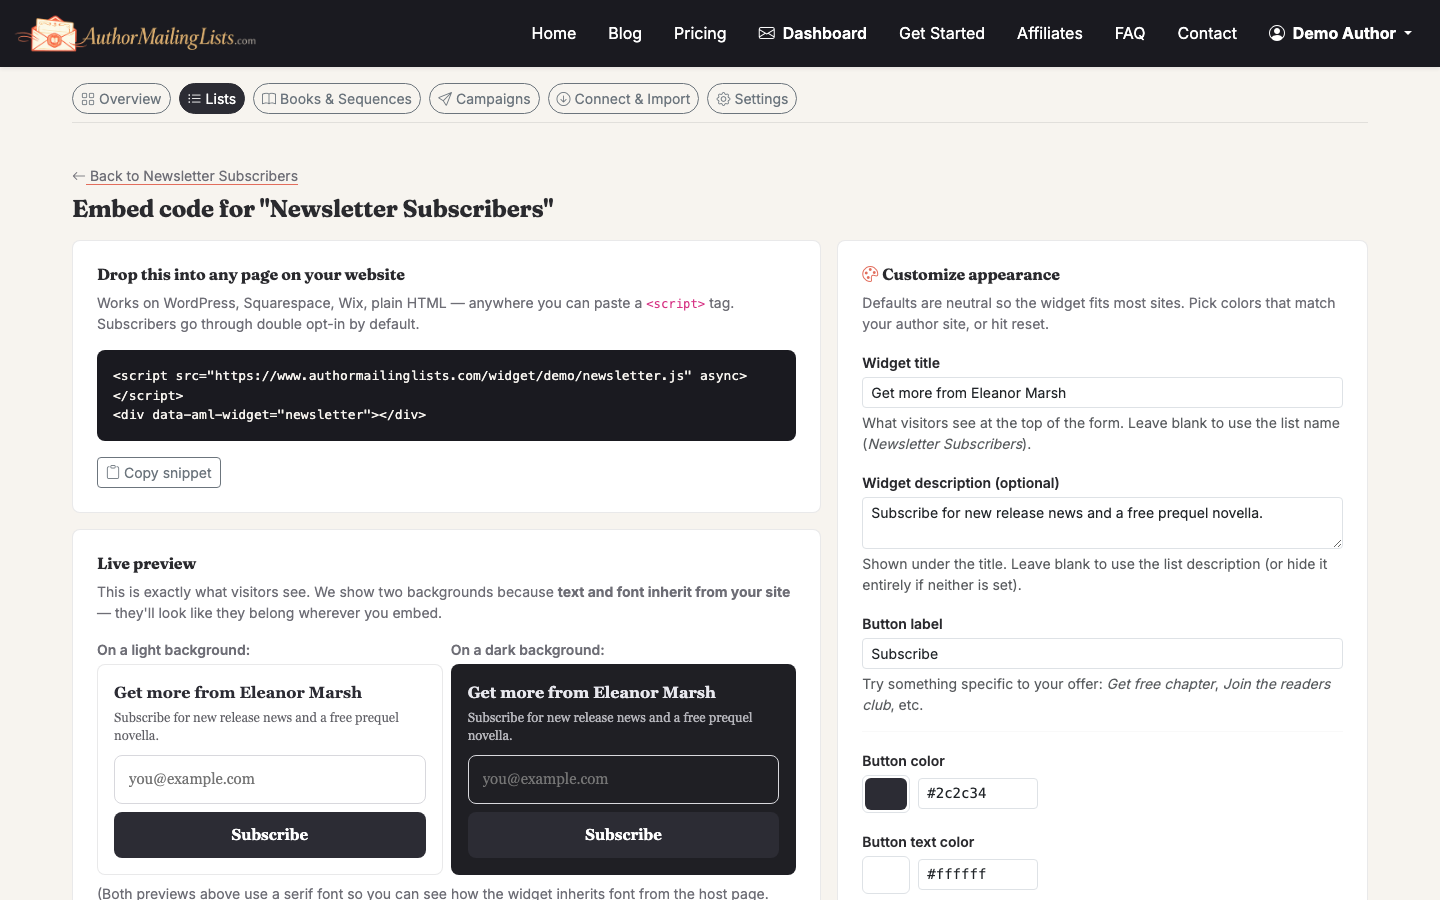
You'll get an embeddable HTML snippet. Paste it into:
- Your author website (sidebar, footer, or a dedicated landing page)
- Your book's back matter page if you use a tool like Vellum or Atticus that supports HTML
- A standalone landing page if you don't have a site yet
Customize the widget headline and button text before you copy the code. "Join my newsletter" is weak. "Get a free short story + weekly fantasy recommendations" tells readers exactly what they're getting.
Tradeoff to know: The embeddable widget requires you to paste HTML somewhere. If your site is on a platform that blocks custom HTML (some Wix plans, for example), you'll need to use the hosted signup page URL instead—AuthorMailingLists.com generates one automatically for every list.
---
Step 5: Import Existing Subscribers (If You Have Any)
If you're migrating from Mailchimp, BookFunnel, or a spreadsheet, go to Lists → [Your List] → Import.
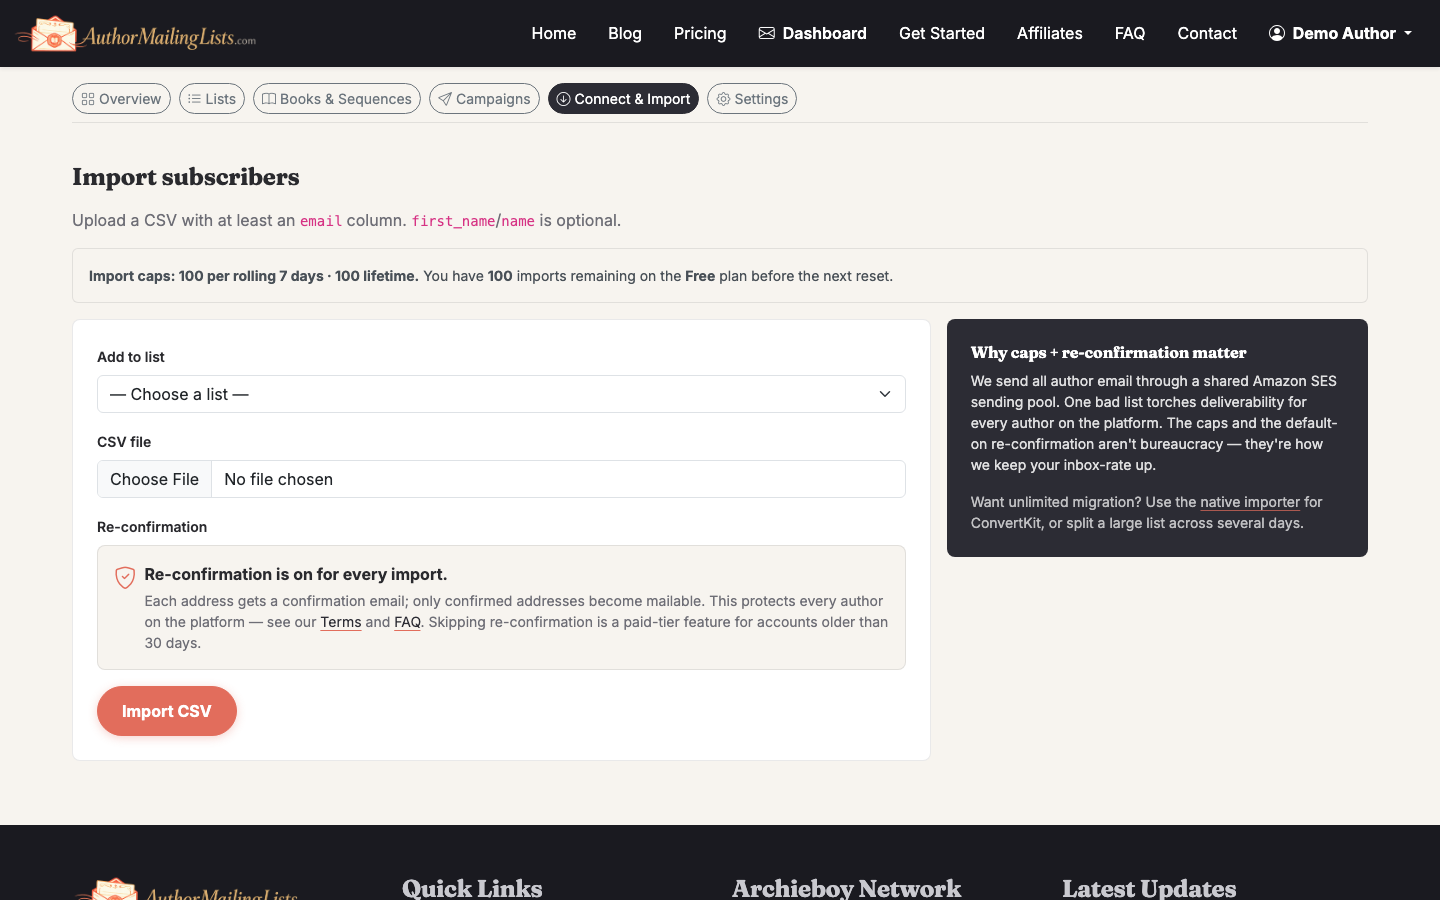
Upload a CSV with at minimum an email column. You can also include first_name, last_name, and any custom fields. The importer maps columns interactively—you don't need to reformat your file first.
Important: Only import people who explicitly opted in to hear from you. Importing a purchased list or a list from a different context (say, customers from a Shopify store who didn't sign up for author news) will spike your complaint rate and hurt deliverability. It's not worth it.
See How to Get an Email List for Marketing (Free Options Included) if you're trying to grow from zero.
---
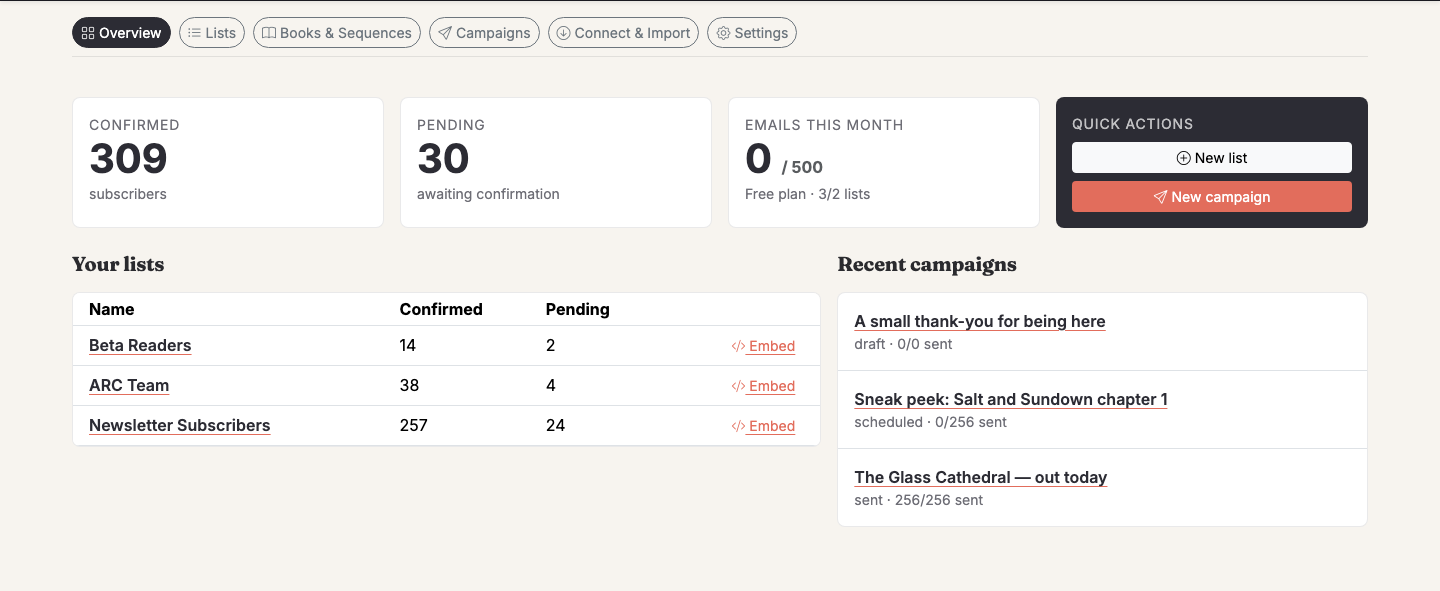
Step 6: Send Your First Campaign
Go to Campaigns → New Campaign and choose your list.
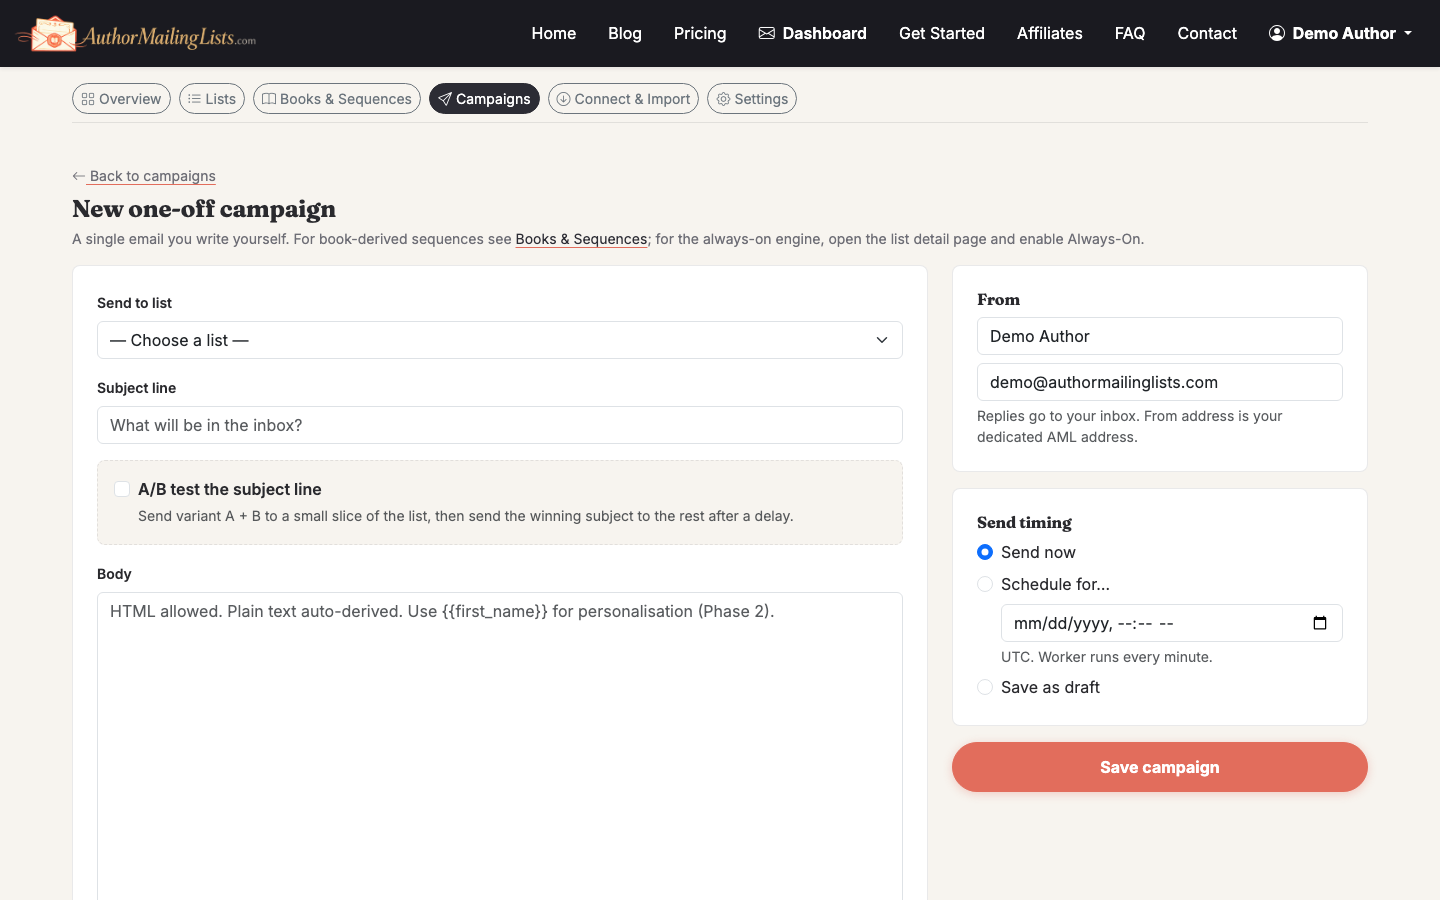
For your very first send, keep it simple:
- Introduce yourself in two or three sentences
- Tell readers what to expect (frequency, content type)
- Give them something—a free chapter, a reading recommendation, a behind-the-scenes note
- One clear call to action (buy link, review request, or just "reply and tell me what you're reading")
Before you hit send, use the A/B subject test feature to test two subject lines if your list has at least 200 subscribers. Below that threshold, the sample sizes are too small to be meaningful.
Once you're happy, schedule or send immediately. AuthorMailingLists.com routes everything through AWS SES with DKIM and SPF authentication already configured—you don't need to touch DNS records manually.
---
Step 7: Turn On Always-On Newsletters
This is the part most authors skip and then regret. Consistency is what builds a list that actually sells books, but most authors run out of things to say after three emails.
Go to Always-On → Enable. The AI will draft a weekly email from your book catalog—character spotlights, theme discussions, reading recommendations tied to your genres, anniversary posts for your titles.

You review and edit before anything sends. Think of it as a first draft, not an autopilot. Most authors spend 5–10 minutes editing each draft rather than 45 minutes writing from scratch.
---
What to Do After Your List Is Live
Once the basics are running, your next focus should be growth. A list that isn't growing is slowly shrinking—people churn at roughly 20–25% per year through unsubscribes, bounces, and inactive addresses.
Read How to Grow Your Email List: Proven Strategies for tactics specific to authors, including reader magnet ideas, newsletter swaps, and BookFunnel group promotions.
For a broader look at email marketing setup beyond just the list itself, see How to Set Up Email Marketing for Your Business.
Related guide: How to Create an Email Marketing Campaign. After the list exists, this guide helps you plan the first useful send.